
Manage
Shared Parameters
Create shared parameters in the shared parameter file, bind them into the project, and transfer them between open projects.
When to use it
Use this when a new shared parameter must exist in the .txt file, be bound to categories in this project, or be copied into other open models.
Why it exists
Revit splits create, bind, and transfer across different dialogs. This tool keeps the whole shared-parameter workflow in one place with a grid you can edit.
How to use it
-
Open Shared Parameters
On the ✚ Annon App tab, click Shared Parameters. Point the tool at the shared parameter file if it is not already set.
-
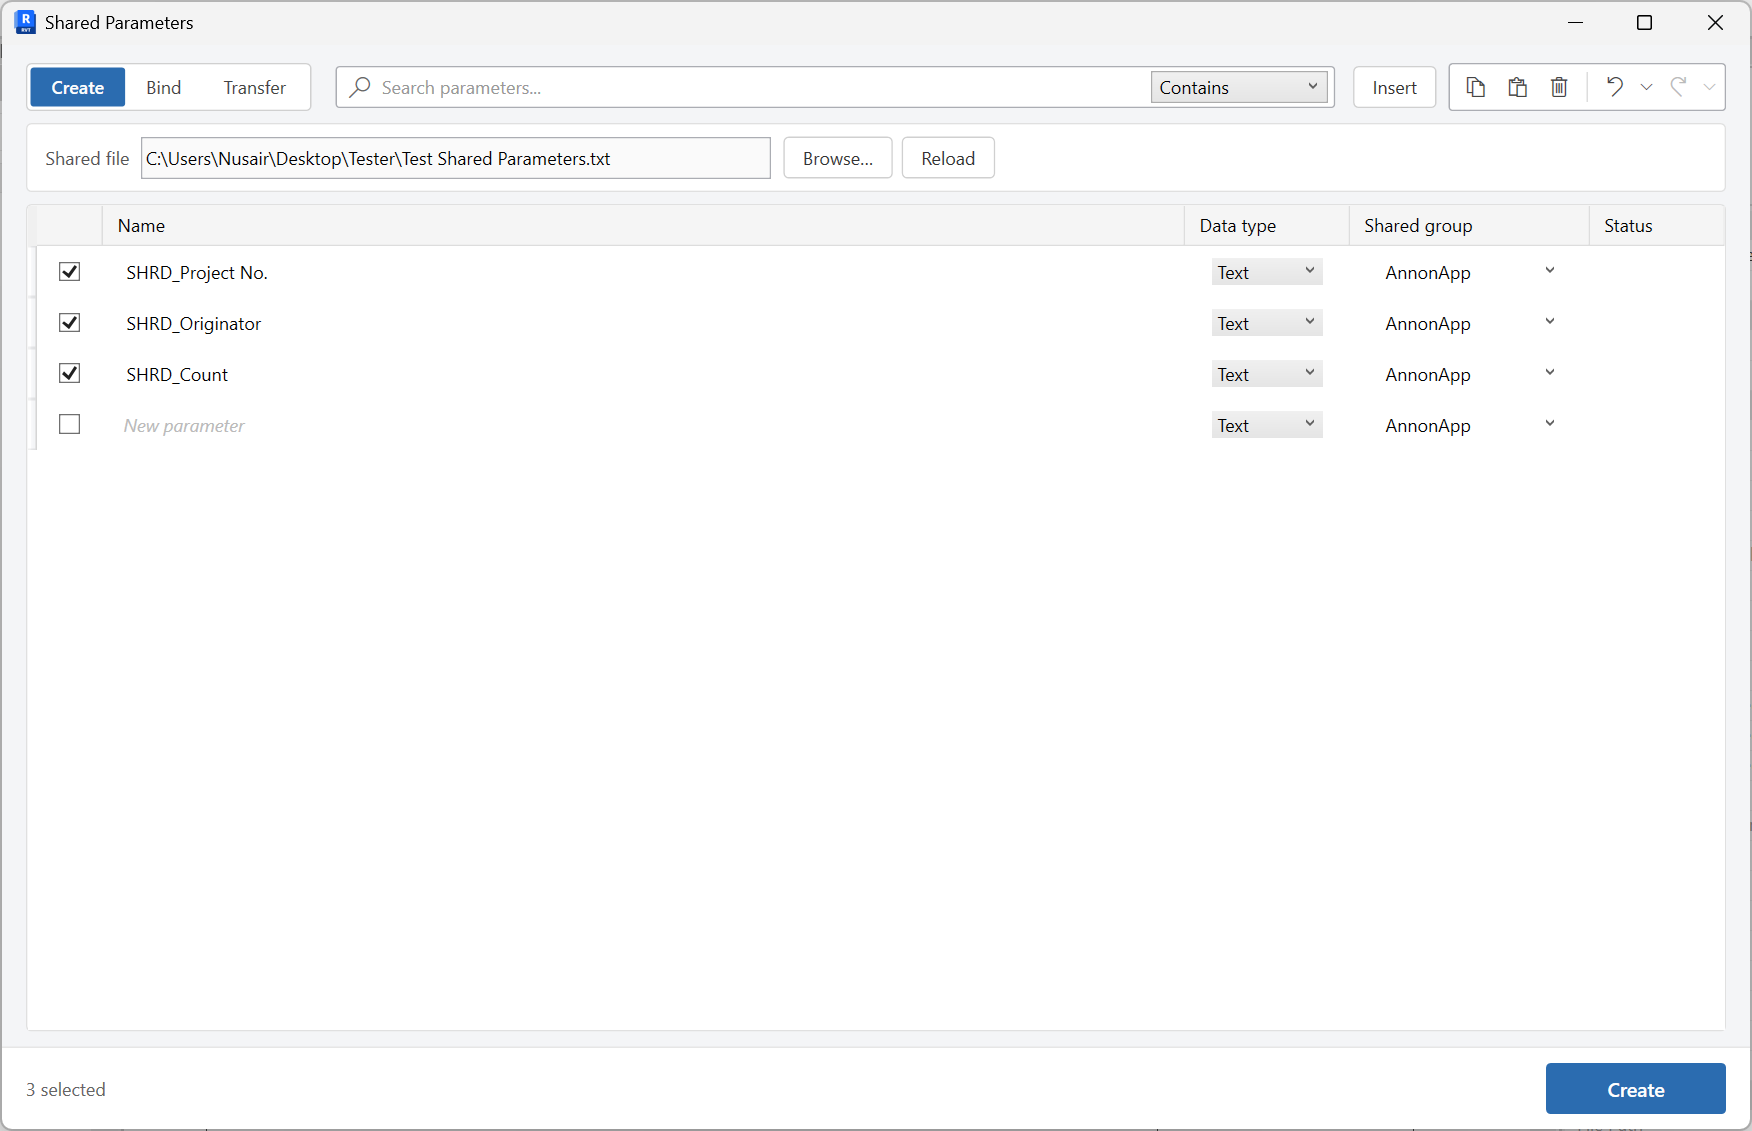
Create
On the Create tab, add names, data types, and shared groups to the .txt file. Insert rows and use the grid toolbar as needed.
-
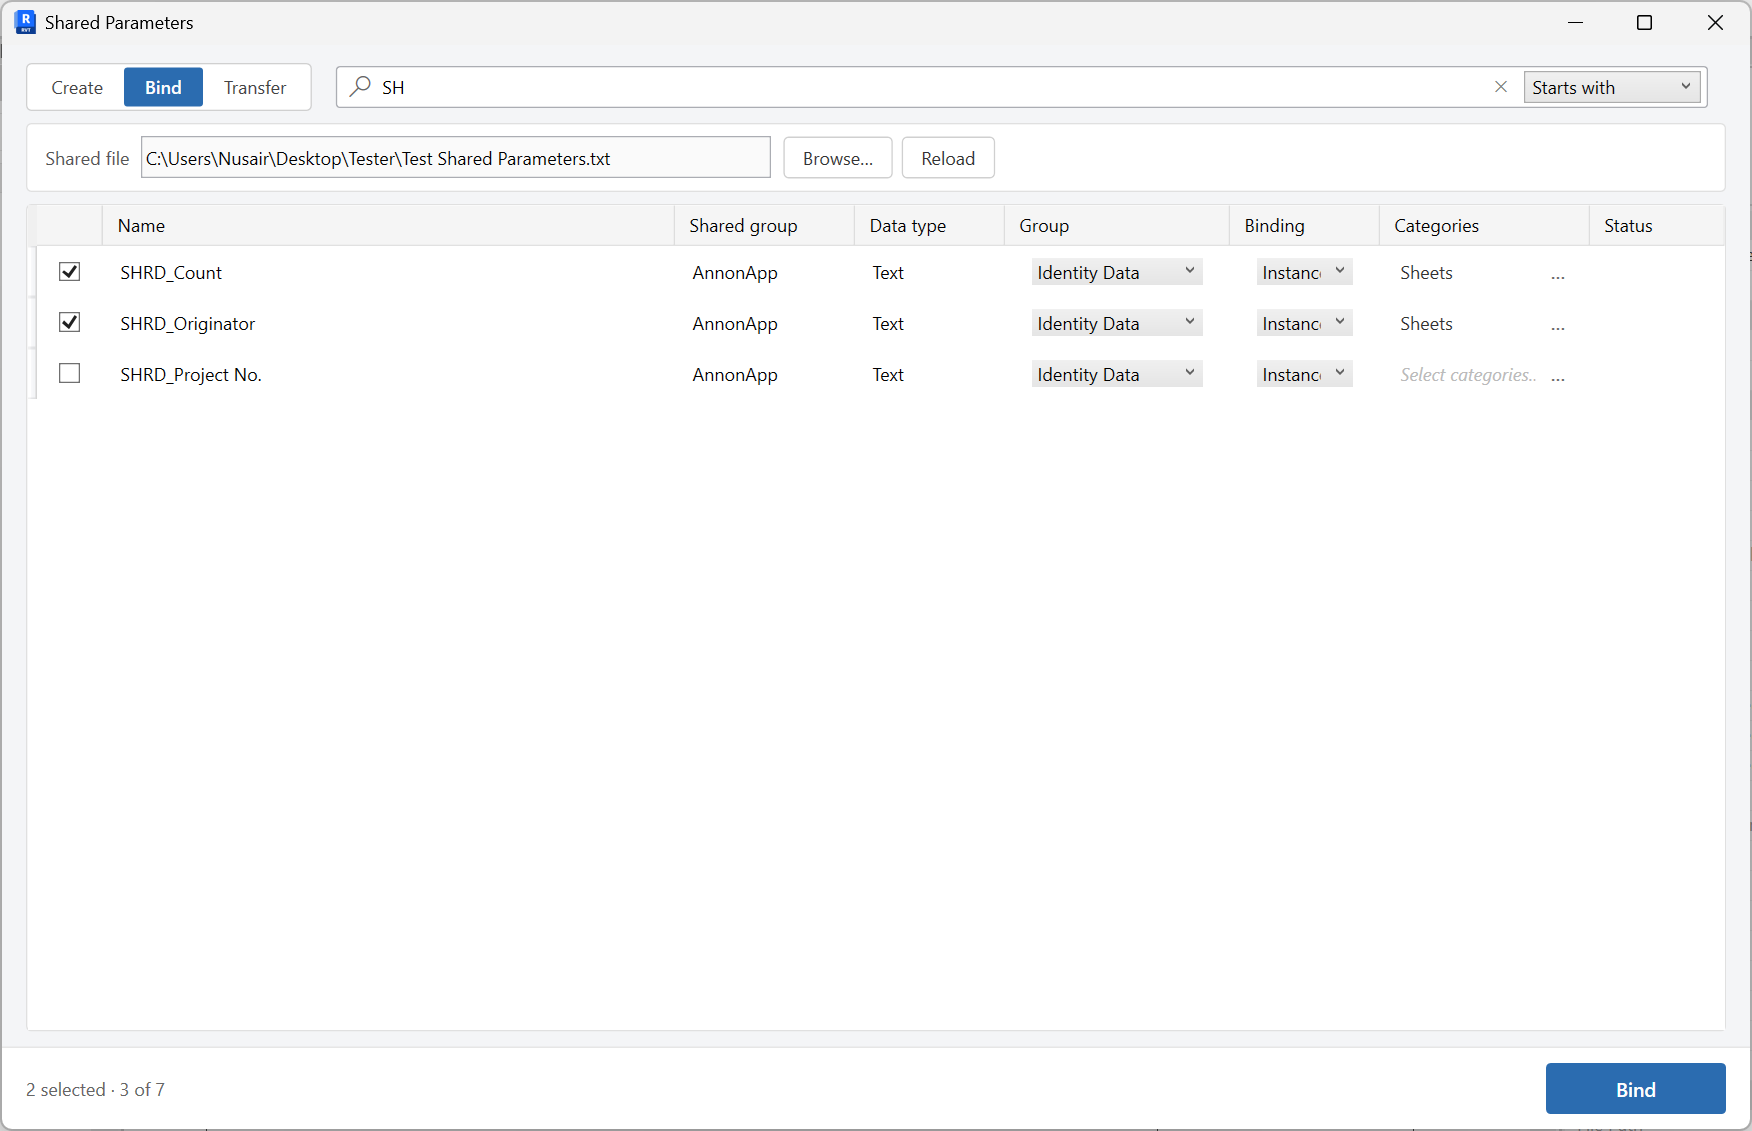
Bind
On the Bind tab, set group, instance or type, and categories (use the … picker), then bind into this project.
-
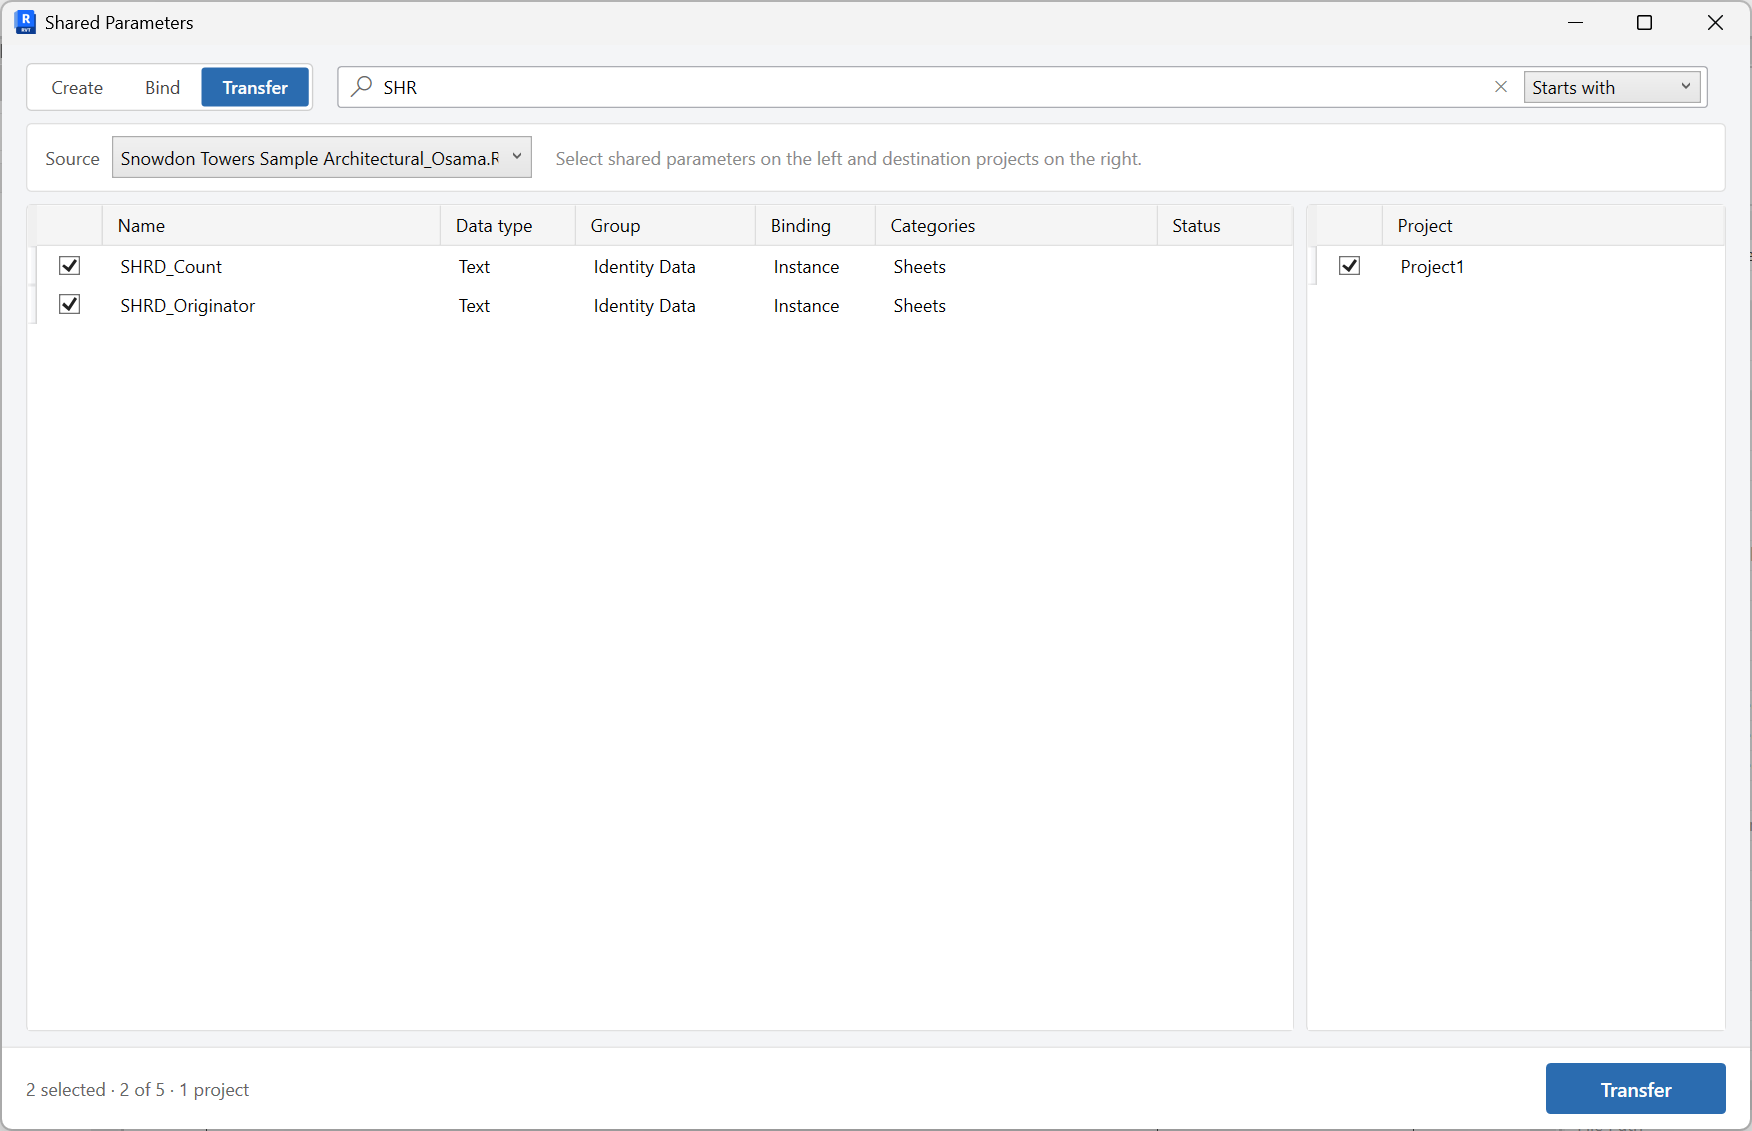
Transfer
On the Transfer tab, copy shared parameters from a source project into other open projects. Status badges show Created, Bound, Failed, and similar results.
Keep in mind
- Purging with Unused Parameters unbinds a parameter from the project; the definition can still live in the shared parameter file.
- Bind before you expect the parameter in schedules or in Schedule Data Update.
Related tools
 Unused Parameters
Find project parameters that have no values on any element and unbind the ones you no longer need.
Unused Parameters
Find project parameters that have no values on any element and unbind the ones you no longer need.
 Schedule Data Update
Open a Revit schedule in an editable grid, change values with copy, paste, and undo, then Apply them back to the model.
Schedule Data Update
Open a Revit schedule in an editable grid, change values with copy, paste, and undo, then Apply them back to the model.
 Revalue Sheets
Batch update sheet numbers, names, and other sheet parameters from an editable grid.
Revalue Sheets
Batch update sheet numbers, names, and other sheet parameters from an editable grid.